
How do I add custom card backgrounds?
Open Design, expand Card background, then upload a JPG, PNG, or WebP image. Check the card preview before printing because a background can affect contrast and readability.
Prepare the background image
The editor recommends an image measuring 1836×2376 pixels and limits files to 5 MB.
Choose an image with enough empty or low-detail space behind the grid. Strong patterns, text, and high-contrast details can make card items difficult to read.
Add the background
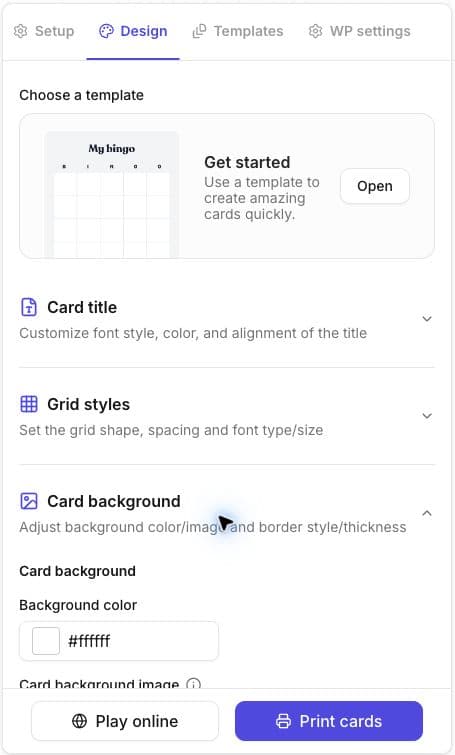
- Open the card in the card editor.
- Select Design.
- Expand Card background.
- Select the background-image upload area, drag and drop a file, or choose Gallery.
- Review the card preview.
The same panel also contains card border controls. Changing the border colour, width, or corner radius does not replace the background image.
Check the result
Review the title, every grid square, and the area around the card. The background should not make text, images, borders, or free-space content difficult to recognise.
Before producing a full batch, inspect the print preview at the paper size and cards-per-page setting you plan to use.
If the image is rejected
- Confirm that the file is JPG, PNG, or WebP.
- Confirm that it is no larger than 5 MB.
- Try the recommended portrait dimensions if the image crops unexpectedly.
Related guides
Was this article helpful?
Related articles
Browse all
Still have questions?
Haven't you found what you're looking for in our support area? Contact us by selecting the button below.
Contact us